
2. Linear workflow with color depth and color adjustments – Part I
Summary – in this part of the tutorial I will explain first, the meaning of linear workflow and color depth. Secondly we will see why it is so important for our daily workflow. Later, in Photoshop we will grade and integrate two images from different sources so they can match together.
a. Linear workflow with color depth.
Linear workflow it is a standardized algorithm for displaying digital content – a common term used in our industry. This term is translated to a graphic line, derivate from a computer coding algorithm, which defines the look of the images. The coding algorithm makes possible the visualisation of videos and pictures on digital mediums like TVs, monitors or digital cameras.
The digital linear format has its origins in the analog film photography and I will explain it bellow:
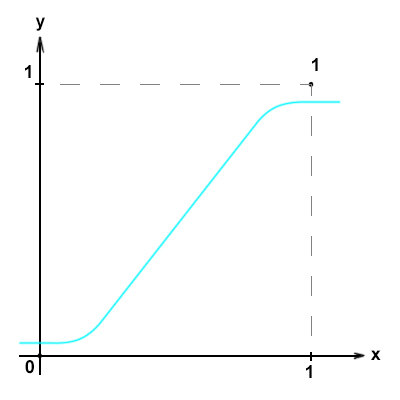 Analog Film negative
Everything started from the analog film photography.The physical way the image it’s printed on the film negative, it’s translated graphically, to a sinusoidal curve. Bottom will be 0 (black) and top will be 1(white). But as you can see there is no absolute black nor absolute white in an analog image capture.
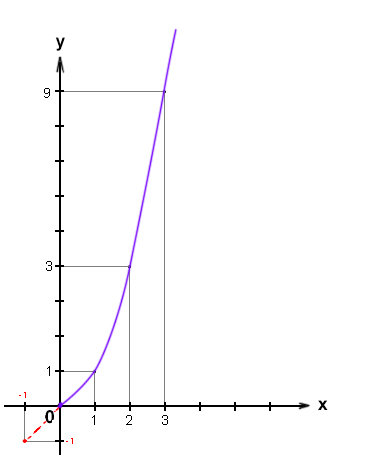 Logarithmic conversion
When film analog was converted to digital format for the first time it was digitally scanned.
In order to capture as much information as possible, a logarithmic algorithm was used to encapsulate the information in a digital format. You can see this translated in a curve on the left side.
Note: On short the value of 1 on X axe equals 1, same on Y axe, but the value of 2, equals 2 on X and the 2 power by 2 on Y (two power by two equal four). For 3, the value on X axe equals 3, but on Y the value is 3 power by 3 (three power by three equal nine).
To ensure that more information is captured for the dark values, the curve is going negative for a bit.Note: In a logarithmic file format you will have negative values for black.
Note: The digital scan of an analog film was introduced in the early 1990s. The file format used initially for this process was called CIN and was patented by Cinesite under Kodak film. Lately was adopted as standard file format for VFX industry as DPX extension.
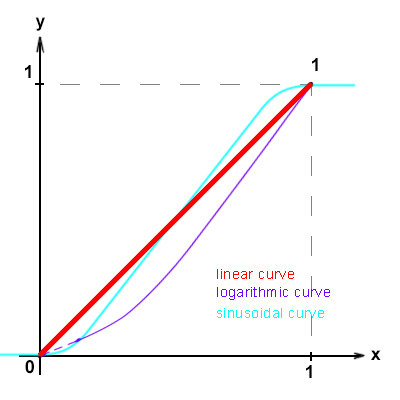 Linear workflow conversion
Giving digital environment considerations, the logarithmic curve was reduced to a straight line. This is where the Linear Workflow was introduced. See the image on the left side.
Note: For simplification reasons, the lowest values (black) it is mapped as 0 and the highest values (white) it is mapped as 1. All the values between 1 and 0 were mapped on a straight line.
Note: I put together all types of curves so you can have a better visual over what is happening in practice.
Appendix – Gamma 2.2
It is a nonlinear operation used to correct the look of brightness of the CRTs displays (the old TVs, with CRT tubes). Due to physical limitations the broadcasted images were displayed very dark. In order to correct this issue a standardized color correction – Gamma 2.2 was introduced. See the pictures below for a graphical description:
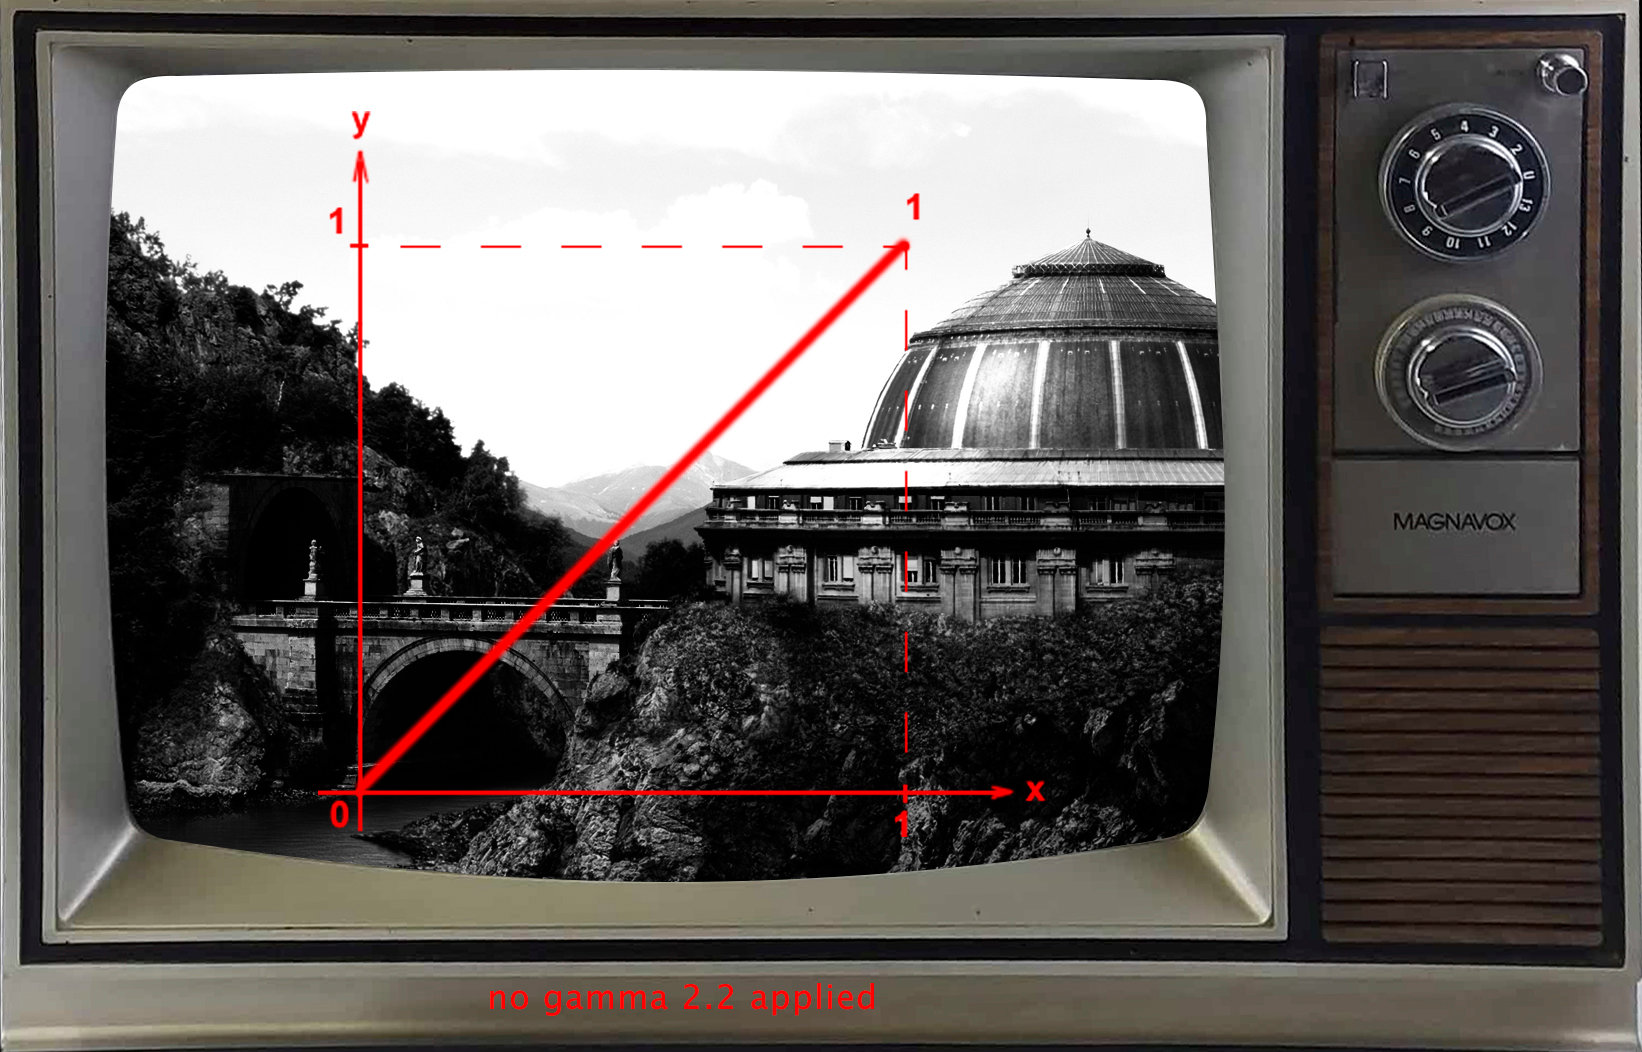
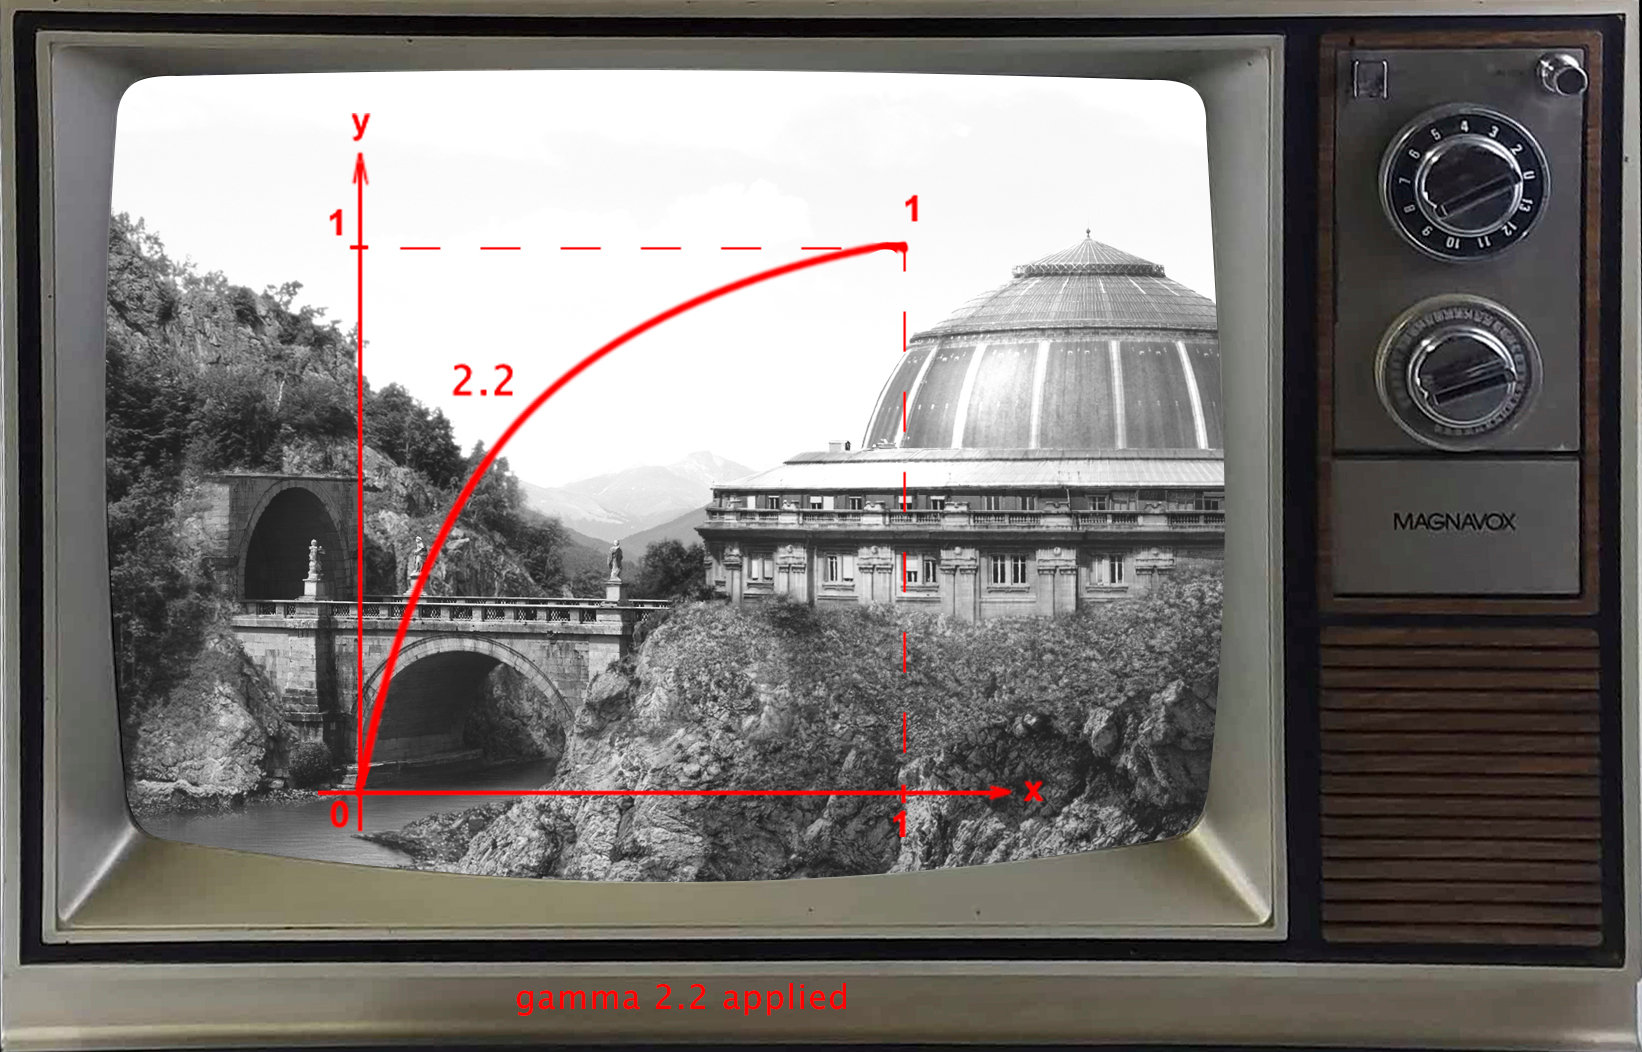
Note: for additional understanding of gamma 2.2 see the following link
We learned so far how color values are mapped on different curves based on the color space.
Although we can define, in a simplified way, the translation between the highest and lowest values being a straight line, there is something more behind. This is related with the amount of separations between the lowest value “0” and the highest value “1”. All this information is applied per each pixel in your image.
As a conclusion, in practice we give the value of 0 to Black and the value of 1 to White. The translation between those two values is done on a linear scale. Therefore, based on the amount of pixel depth we can have more separations or less.
Pixel depth
To understand the color depth per pixel, let’s start with one bit. A bit is defined by two values 0 and 1. Zero as we talked will be black and one will be white. If we want to create a painting in 1bit depth that will look like the image bellow:
As you can notice it is not enough, so we need more than
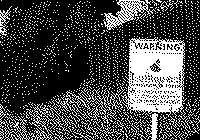 one bit per pixel in order to have a defined image. On top of that we need to have 3 channels, Red, Green and Blue for a color image. Therefore we have to move to at least 8bits per channels images.
One bit picture – Image takes it from wikipedia
8bits – per channel – the most common files we find today – the JPG file. You can find this file format everywhere and has a standard of 8bits depth/ per RGB channels. Following is a schematic representation of an 8bits separation.
 It means that the amount of values we have between black and white is 256 separations for each channel. We reach to this 256 number by powering the value of 2 to 8(8 being the amount of bits).
16bits – per channel will have even more depth per channel since 2power by16 equals 65,536 separations between black and white. Following is a schematic representation of an 16bits separation.

32bits – per channel will be 2 power by 32 equals 4,294,967,296 separations. At this stage we have fine details when we try to make any color adjustments. Following is a schematic representation of a 32bits separation.

In the end, carrying those huge values would be very complicated; this being the reason why everything was simplified again, having the highest value defined as 1 and the lowest as 0.
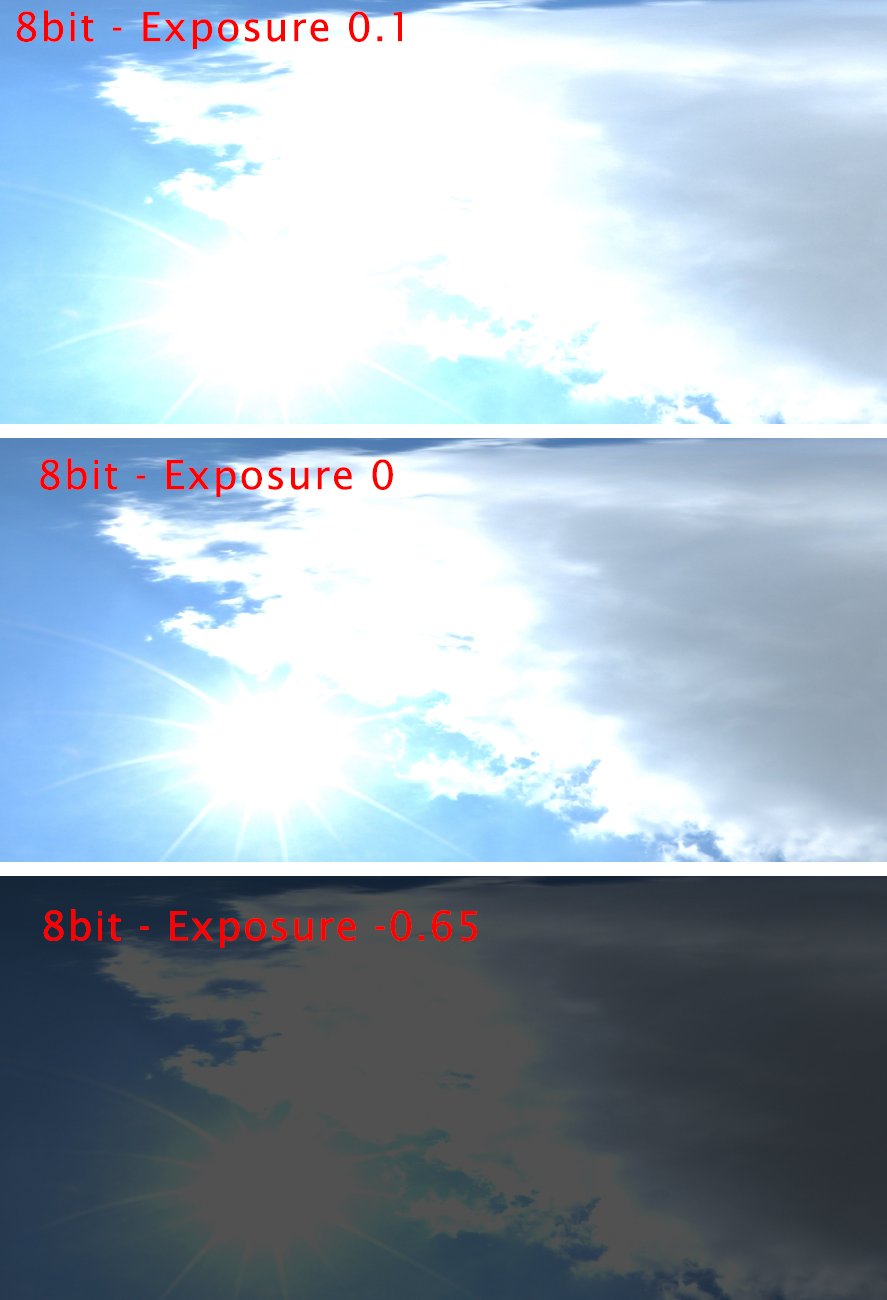
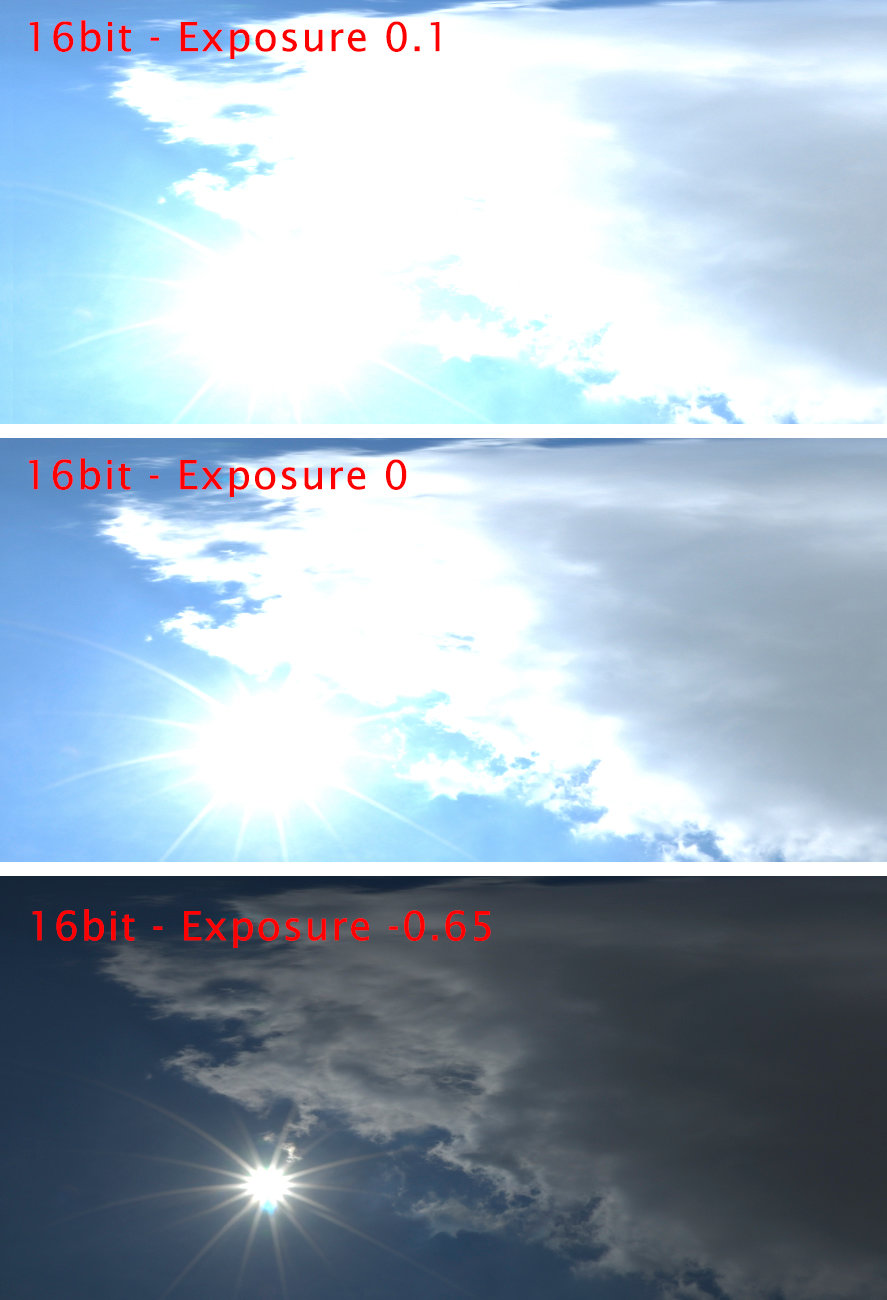
Capturing images in wider color range (raw or nef) than 8 bits (JPG) will give you more information. In the images bellow, you can notice that if we apply an exposure value, the 16 bits has stored information, while the 8 bits is flat. Even if you don’t notice the information at the high exposure on the 16 bits image, at a lower exposure the extra details are revealed.
Conclusion
Linear workflow refers to a standardized digital format. Either you work with 8bits or 32bits you will still have a linear workflow. Don’t make the confusion that just naming linear it means that automatically will provide color depth/ channel. In order to achieve color depth you need to work in at least float 16 bits, otherwise the values for 8 bits are integers.
Common confusion – the simple application of a Gamma 2.2 curve on an 8 bit image/channel will not convert that image in 16 or 32 bits, it will just provide visual correspondence of the 8 bit values with the 16 or 32bits. The 8bits image will remain with flat values even after you apply the gamma 2.2. If you want to have the depth extended to 16 or 32bits, your base format should be set initially to 16 or 32 bits. After that, every image that you load from an 8 bit source and you apply a color correction will have the depth extended to 16 or 32 bits.
Note: The above description is a very simplified explanation, in order to help you understand the importance of the technical demands of our daily routine. I encourage you to check by yourself more information about the following: linear workflow, gamma 2.2, ACES, color depth, logarithmic color space.
Next we will learn color adjustment methods in Photoshop.