
3. Advance matte paint creation – Part II
Summary – In this part of the tutorial we will take the EXR or PSD file with matte paint passes and we will build our 2.5D projections.
We will start from the same projection‘s layout, that we learned in Chapter I. From there we will add color adjustment nodes, where need it, so we can integrate as well as possible our dmp layers. Following, we’ll split everything on multiple dmp passes that comp will use for further adjustments.
In the current projection layout there is one major difference: we will replace the camera projection with a frameHold node. As mentioned in the first part of Chapter III, this is to make the script lighter.
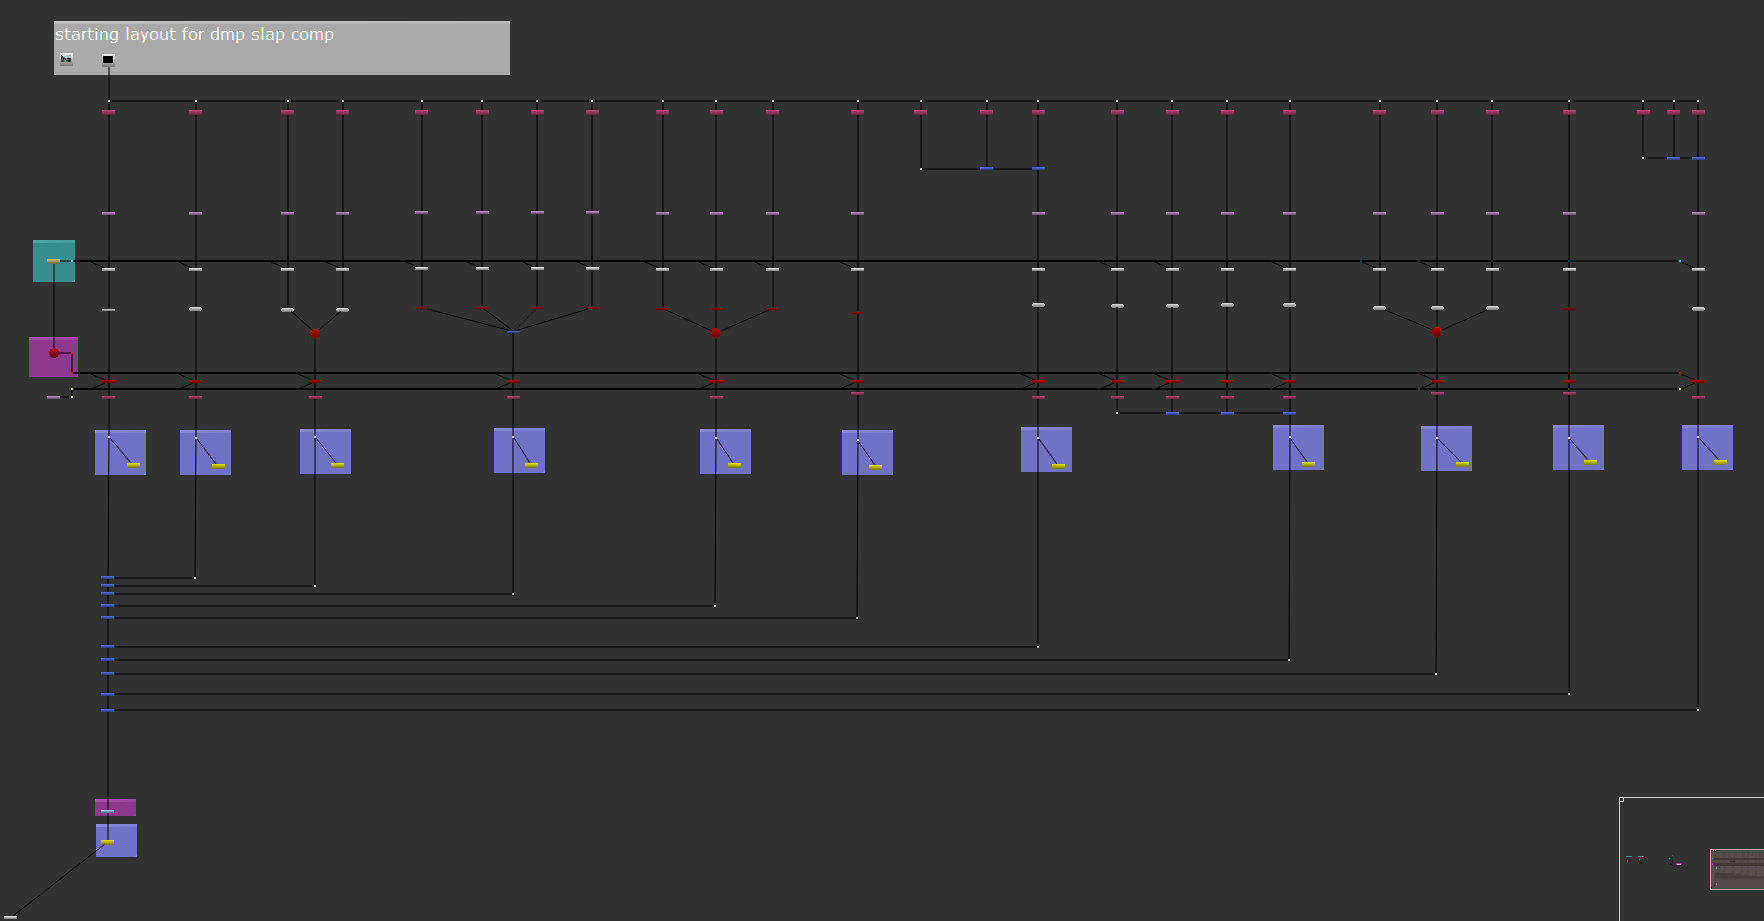
Your starting layout for projection will look like this:
 Bellow I will detail the steps I use to build this Matte Paint Projection in Nuke. The focus will be on the steps that were not previously covered in Chapter I and II.
Roto Node for masking
There are a few layers where I had to create masks to define a certain area for grading or to simply remove it. In order to define a mask this is the process:
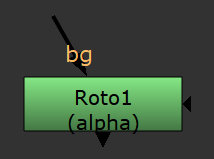 Create a Roto node by either typing “o”, on your keyboard or press Tab, then type roto in the search bar.
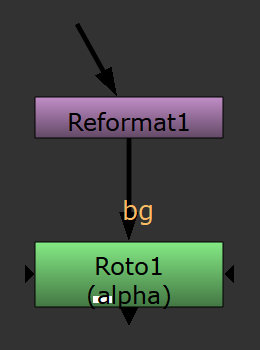 Create a reformat node that will be used to define the area on which we create the mask. Connect the input of the roto node with the reformat node, like in the image on the side.
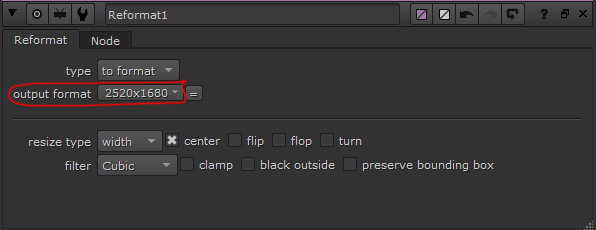
Under the reformat node, set the resolution of the image on which you want to apply the mask. For the current case we want to apply the mask on the painted layer and the resolution is 2520×1680px. All the other parameters of the reformat node, will remain by default.
Select the roto node and open the parameter’s tab.
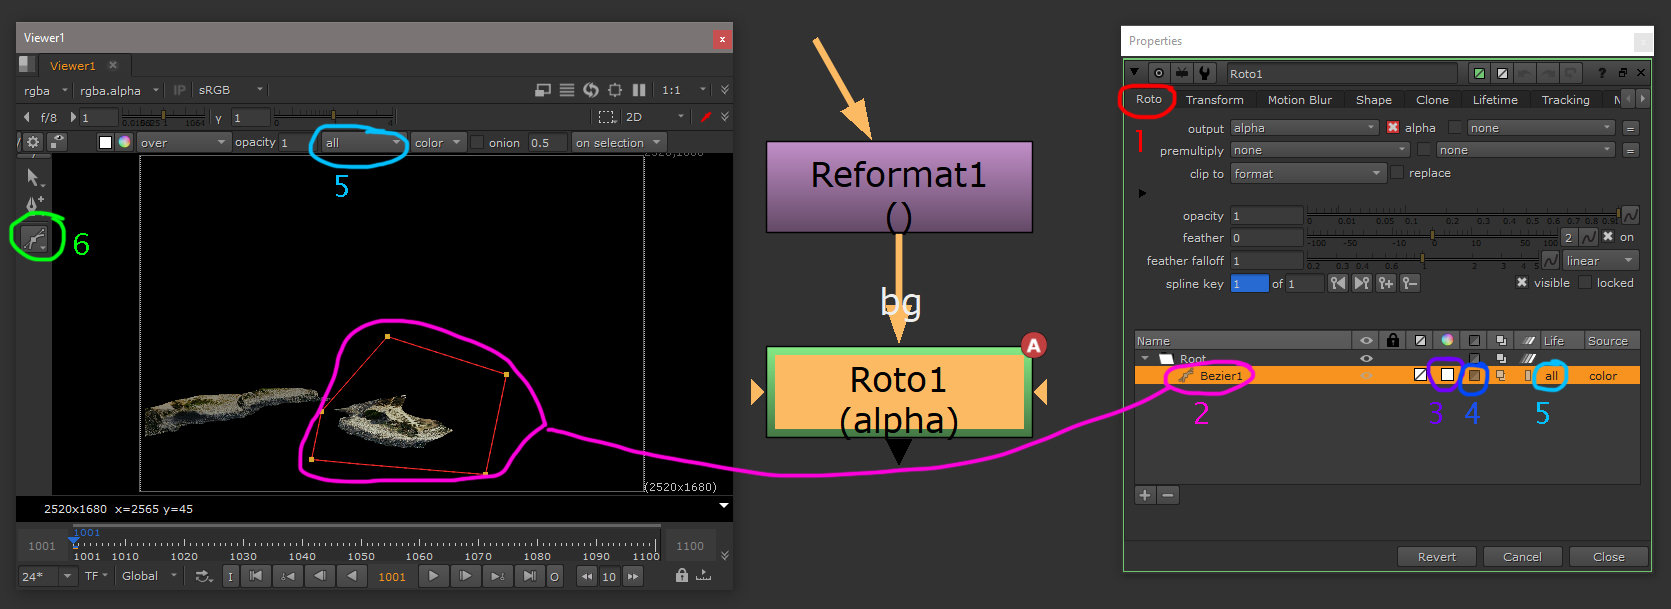
1. The Roto tab contains most of the parameters we need to adjust. I will focus only on this tab, but feel free to explore all the other tabs.
2. The Curve we create will be displayed as a layer with various parameters.
3. The Color square will help you adjust the alpha transparency for further curves created.
4. Invert selection. Define if you want to use what is selected or what is outside of the selected area.
5. Life of the curve – the curve can have an effect only for one frame, from the current frame to end or current frame to start or, it can have effect for the entire animation. For the current case the curves will be set to all, meaning that will be visible for the entire frame lengths of the animation.
6. Create curve tool – creates the curve that will define the selection we need.
Outside of the parameters explained above, there are two more parameters useful for daily routine: feather and smooth point.
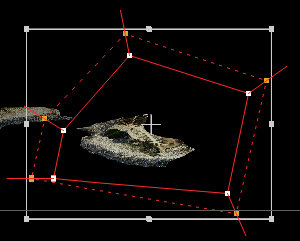 Feather –creates some gradient values for transparency on the edge of the shape. Select the entire curve, by simply dragging with LMB a selection. Press on the keyboard “e” multiple times, this will increase the featheriness. If you want to reduce it, either select the yellow dot and push it back to the corresponding white dot or by pressing SHIFT+e will reset to zero the feather line or selected point.
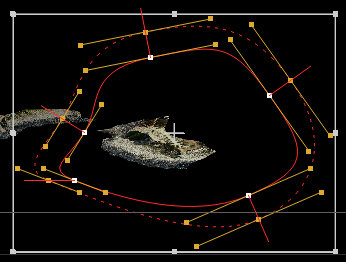 Smooth point – creates smoot corners for the entire curve or only the selected points. Drag a selection over the entire curve and press “z” once or multiple times. The bezier splines will be display and you can adjust the smoothness of the curve. If you want to reset the smooth Bezier just press SHIFT+z.
Note: in order to be able to select the curve you should be on the select all button of the selected curve, otherwise will not work.
Create mask with Roto node
Once the selection area is defined, you can use it for masking too by plugging it in the merge node. Connect the output of the roto node with the input A from the merge node and then switch to mask blending, under the operation parameter. See the image bellow:
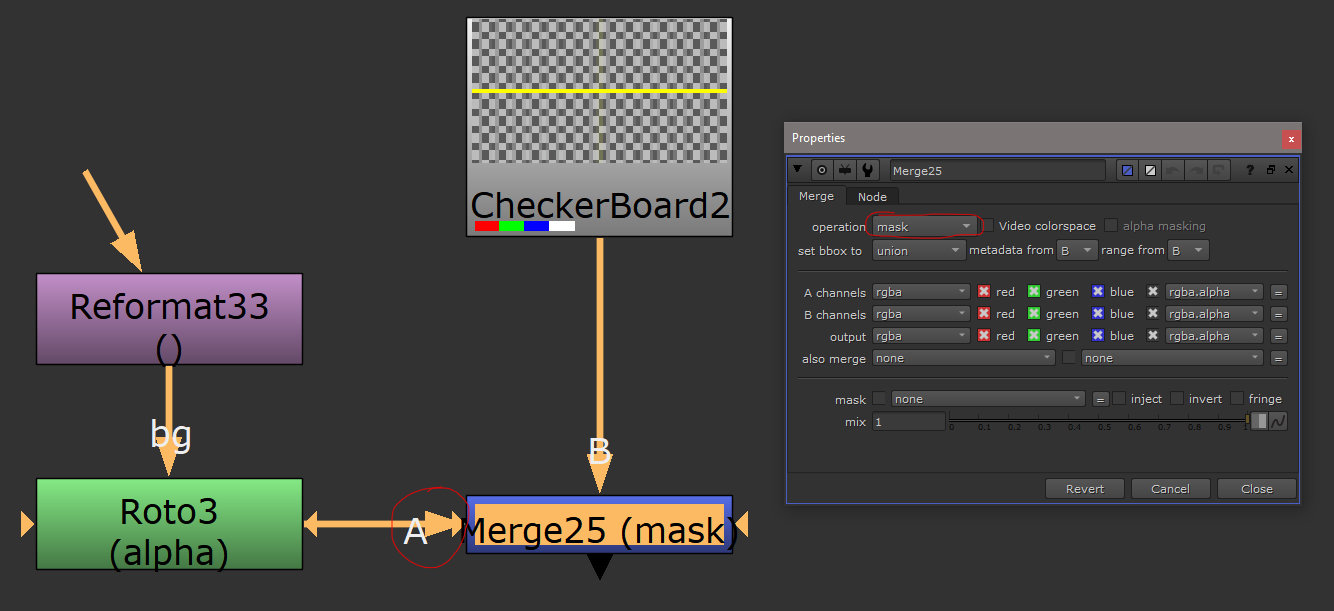
Define a mask with the Roto node
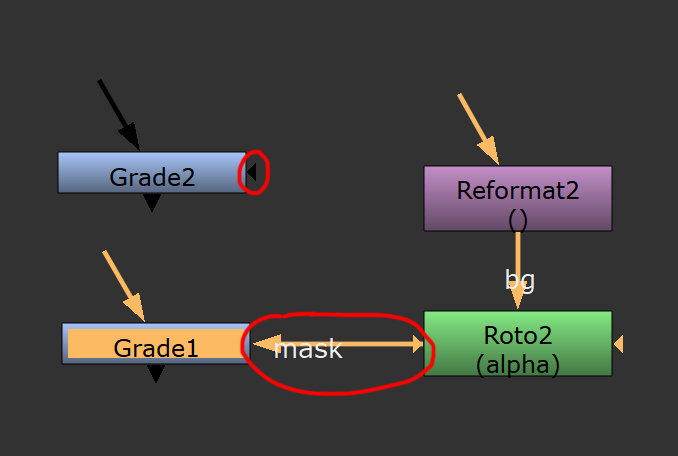 Use the same nodes, reformat and roto, then simply connect the roto output with the mask input of any node (that has a mask input). See for example grade, color correct, blur, etc, they have a tiny arrow on the side. If you select the tiny arrow, the mask name will be displayed, just like in the image on the side.
Blur node
I use it to match the blurriness of the painted layers with the blurriness from the plate. It is a very easy to use node it does what it says. I use this node only for some of the layers, not everywhere.
Merge node
For bringing together multiple layers that build one dmp projection pass I used merge with the operation set on Over. Over it is the default parameter and it’s meant for blending images based on the alpha.
If you use images with just RGB channels, without alpha, use the operation Plus.
For the merge nodes that you use under the scanlineRender node (for merging rendered passes) set the parameter also merge to all. This parameter if is set to all, will merge any additional channels that are rendered, other than RGBA (motion blur, zdepth, etc).
ScanlineRender node
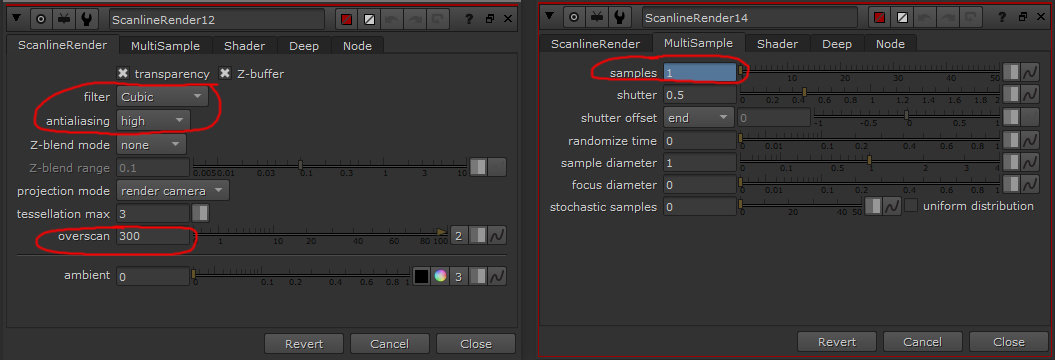
Scanline Render Tab:
Filter I left it by default. This is related with the antielizing for the images projected.
Antializing – changed on high. This will create nice border edges for the geometry.
Overscan – I added 300 for having overscan, in case there is lens distortion or any other use by the comp, later on.
MultiSample Tab:
I left everything by default, except the samples parameter. There I wrote the following expression: $gui?1:12
Where $ means if you are in the menu gui? show me everything with sample 1 for motion blur, but : if you render on the farm (or locally), then render with the value of 12.
This is a very useful expression and very commonly used so try to memorize it.
Remove node
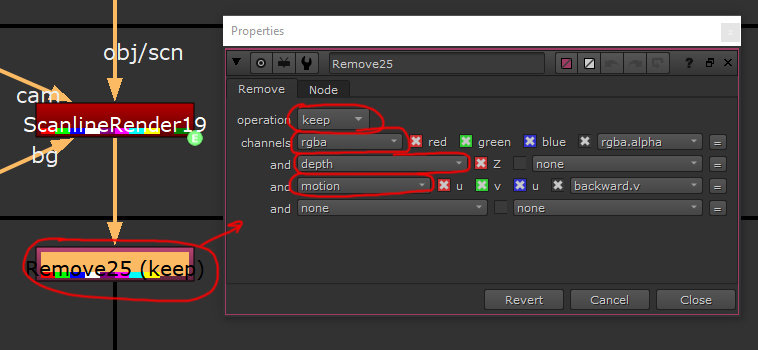 I used this node to isolate just the channels I want for the final publish to comp. Normally you keep the RGBA plus Motion and Depth channels. You can see the set up in the image on the side.
Geometry for projection
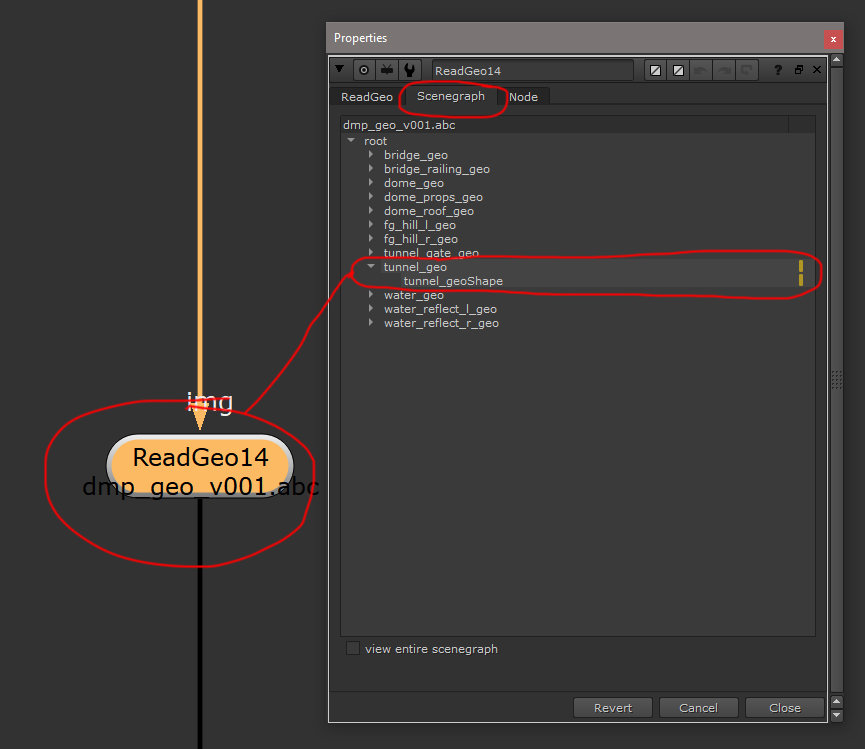 Based on the Layout’s high res geometry, I created a low resolution version, that I adjust it to the matte paint’s design. You can load the geo in one piece, as ABC extension. The geometry is located under the OBJ folder (dmp_geo_v001.abc ) for this tutorial. In the readGeo’s parameters, check the SceneGraph’s tab, there you can isolate only the elements that you need, for each projection pass.
 Adding motion, to the water layer
Note: for water motion reference, see the rendered shot at the beginning of this tutorial.
This set up will be used like a bump pass, to simulate the wave’s movement. I will explain the script, in details, bellow:
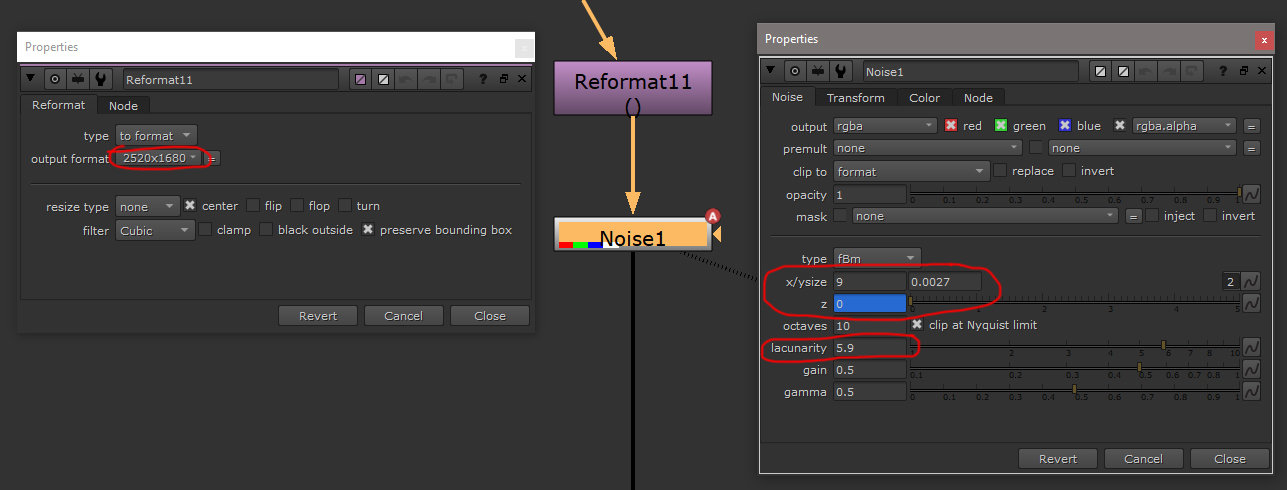
Create a Noise node and connect the input with a reformat. Set the reformat output format to the matte paint resolution (2520×1680px).
For the Noise set the x/y size =9 and 0.0027, lacunarity=5.9, then set an animation for the movement of the waves on Z parameters. At frame 1001 set for z=0 and the frame 1100 set z=5. For setting the animation right click on the value case and select Set key from the menu, then at the frame 1100 just change the value to 5 and an animated key will be created automatically.
Note: for each animated key, the case values will be dark blue, versus a light blue for frames without animation key set. If a parameter doesn’t have any animation set, it will be grey.
Your settings should look like this:
We will then connect the noise with a card node, placed on the same position in space like the water geometry.
Note: We connect the noise direct to the card and don’t use a projection, because the noise will act like a texture mapped on the card’s UVs. This is used, in order to put the noise image in perspective.
All the base geometry that we create in Nuke (cards, cylinders, spheres, etc) comes with the unfolded UVs by default. This is the reason I mapped on a card and not on the custom geo created for the water.
We move forward and we plug the card into the ScanlineRender node. Bellow the scanline node I added two more nodes: a merge node to cut the shape of the water from the painted layer and then a shuffle node to isolate the red channel.
The merge node has the operation set to mask.
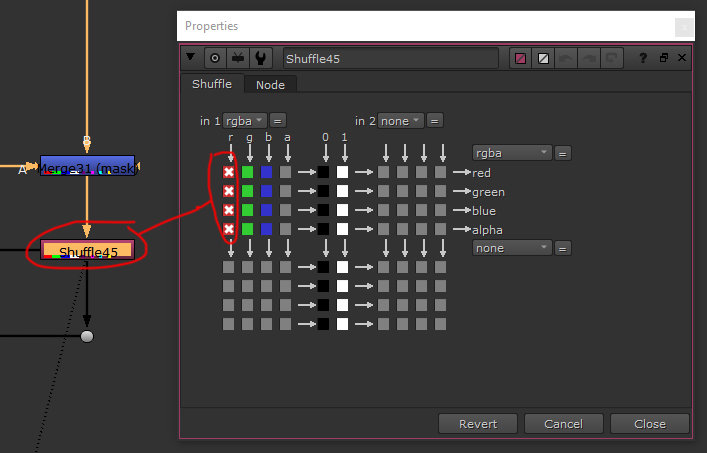 The shuffle node has the red channel isolated just like in the image on the side. We use shuffle every time we want to isolate a channel.
From the shuffle node I made one connection with the reflection pass and use the noise to mask out the shadow area of the wave from having any reflections. The second connection goes to the bumpBoss node so we can simulate waves of the water.
Here is the script layout, together with the bumpBoss node’s parameters in Nuke:
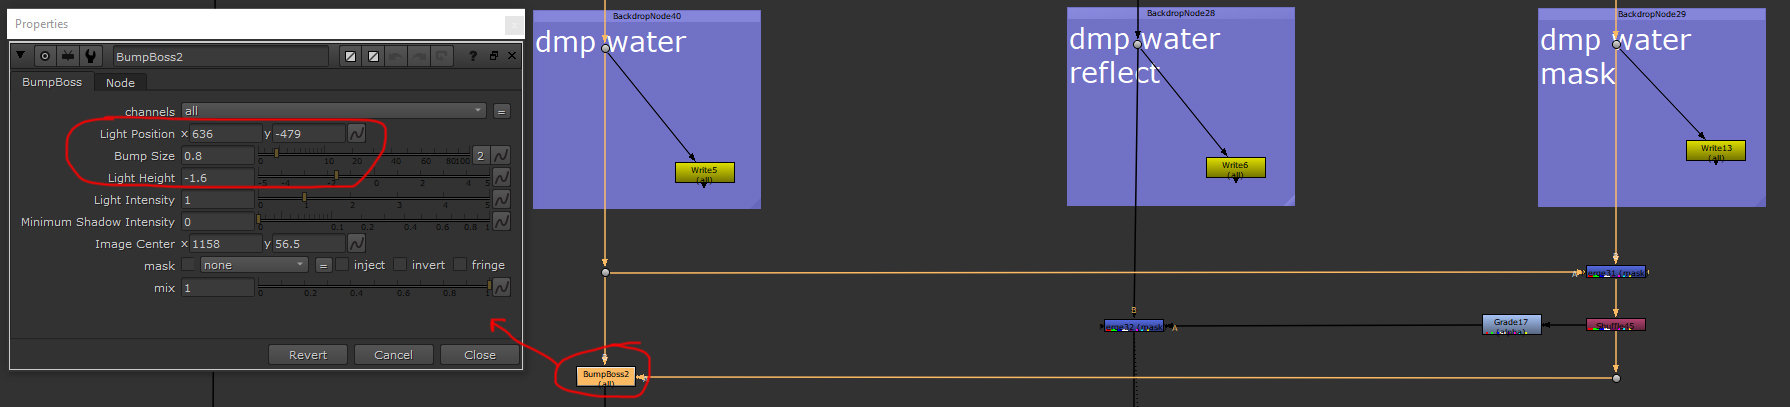
This is a fast method for creating waves movement.
Note: In a feature VFX production, most likely, the water will be rendered or done in a more advanced way. If you work on a TV series or something with a lower budget and tight deadline, you will use this approach for building water, straight in Nuke and save the day.😀
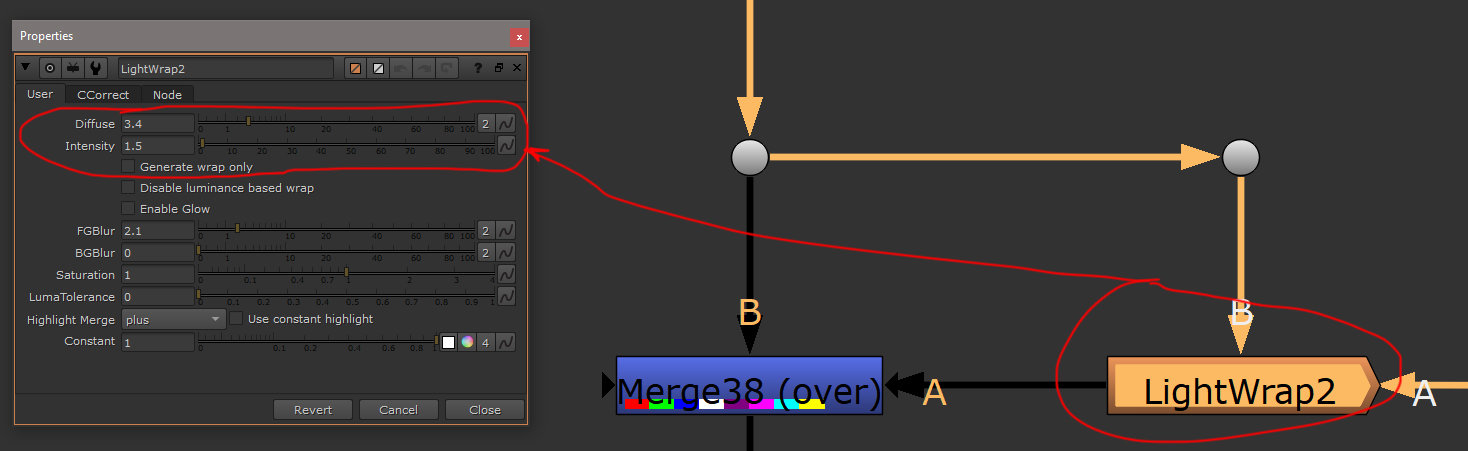
LightWrap
This node it is useful to add something like a glow on the edge of foreground elements so they can integrate better with the background. I use it in the current project, to integrate the dmp_fg_L_hill with the background.
Parameters:
Diffuse –sets the border’s thickness of the graded element, which will be blended with the foreground.
Intensity –sets the intensity of the blending applied on the edge.
Generate wrap only – if it’s checked will show just the area affected by the LightWrap.
The rest of the elements are for fine tweaking, feel free to explore them.
Note: You can manually create this effect by combining two erode nodes. Create one erode blur node with extended alpha and another one with shrink alpha, then use a merge node with operation set on exclusion; this will generate the border. Finally, isolate the border so you can use it like a mask for a grade node. You will find this set up in Nuke under the dmp_fg_L_hill pass.
You can find bellow the settings for the LightWrap node.
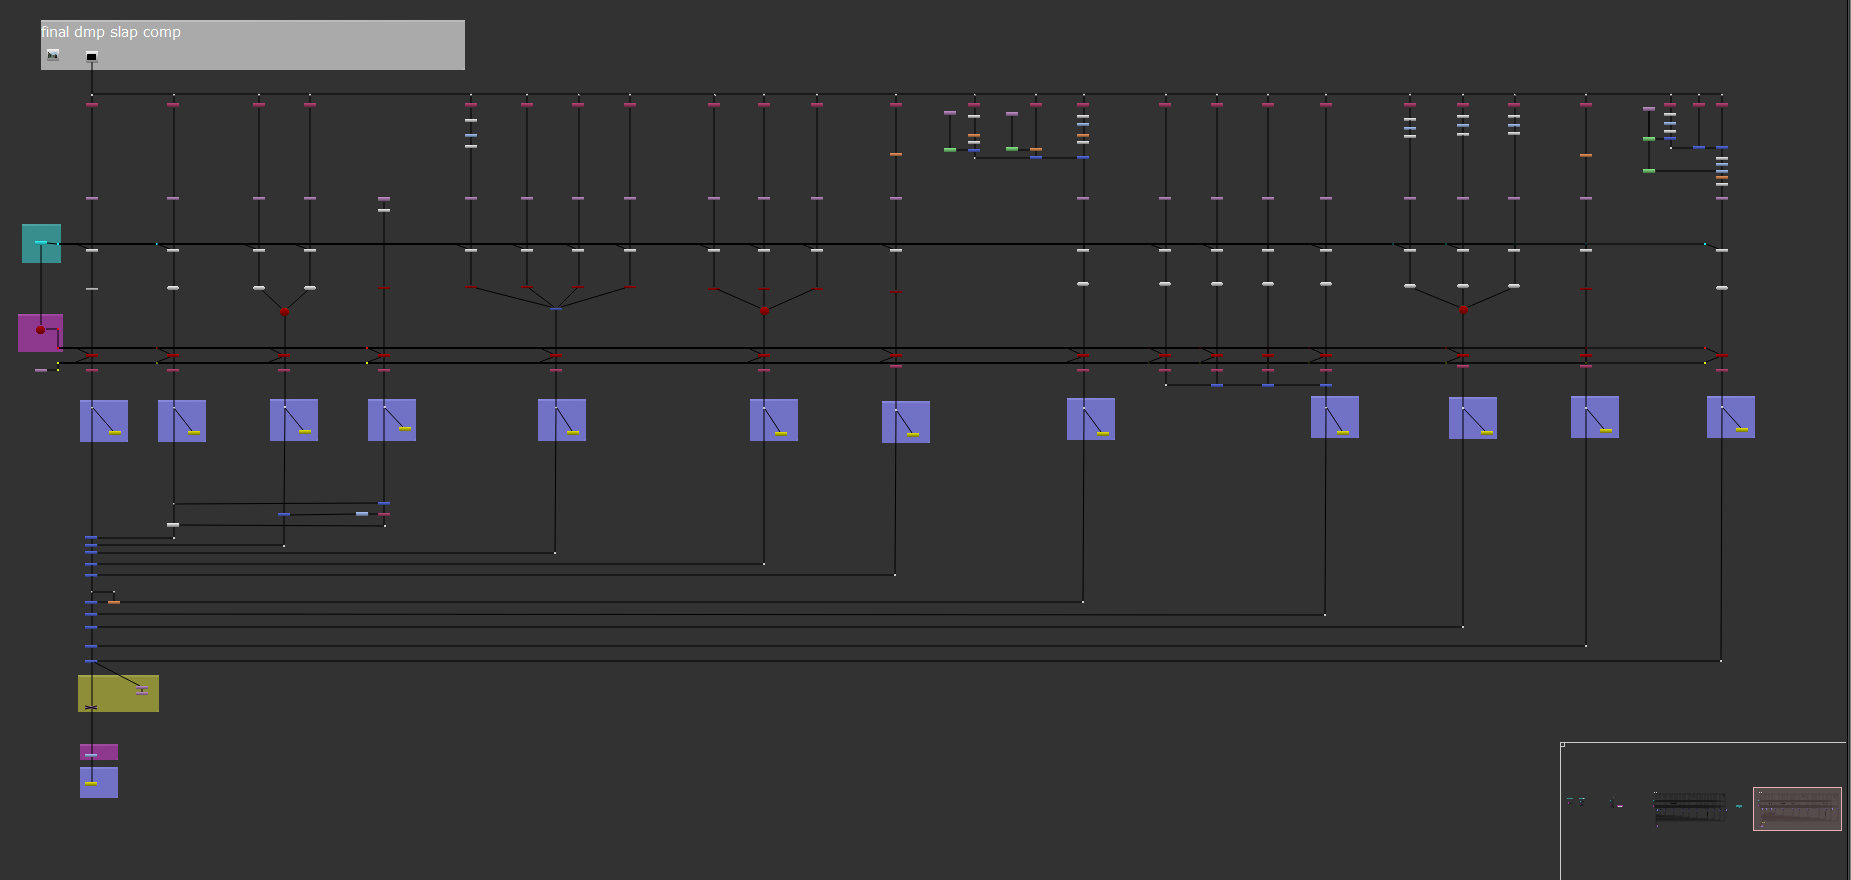
This is the final layout for projection:
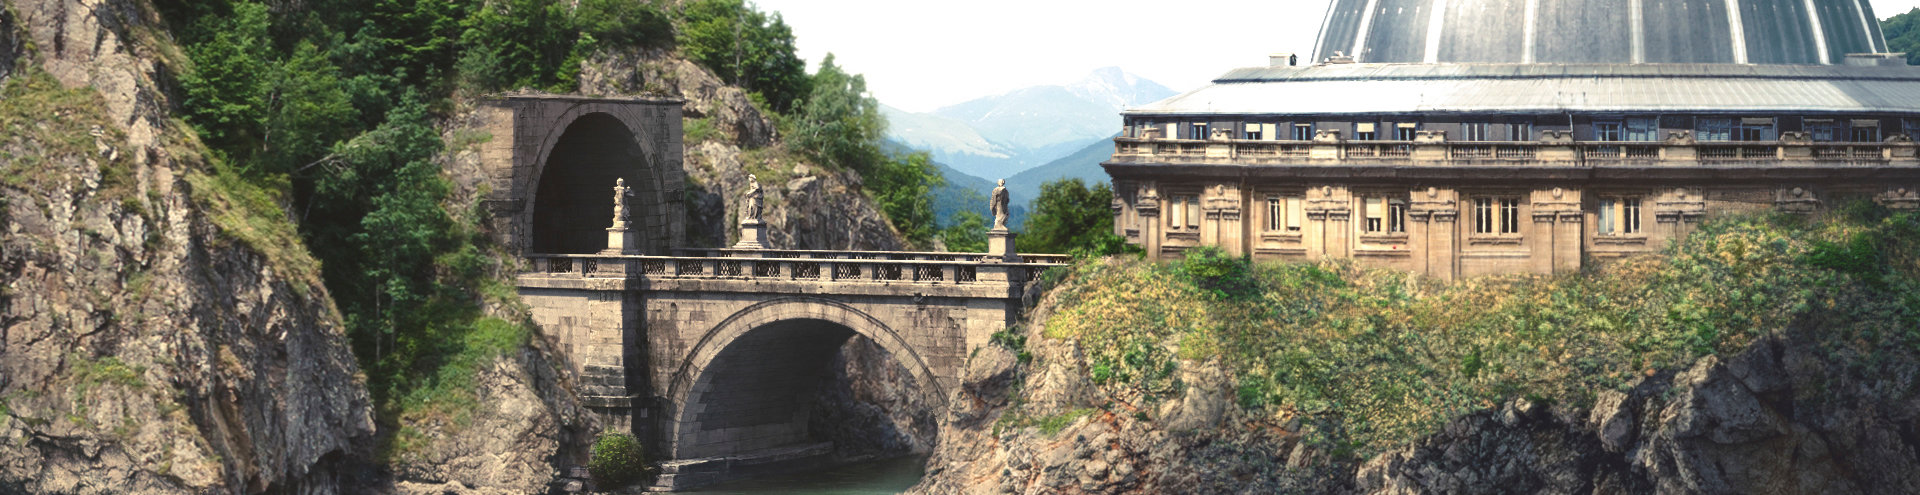
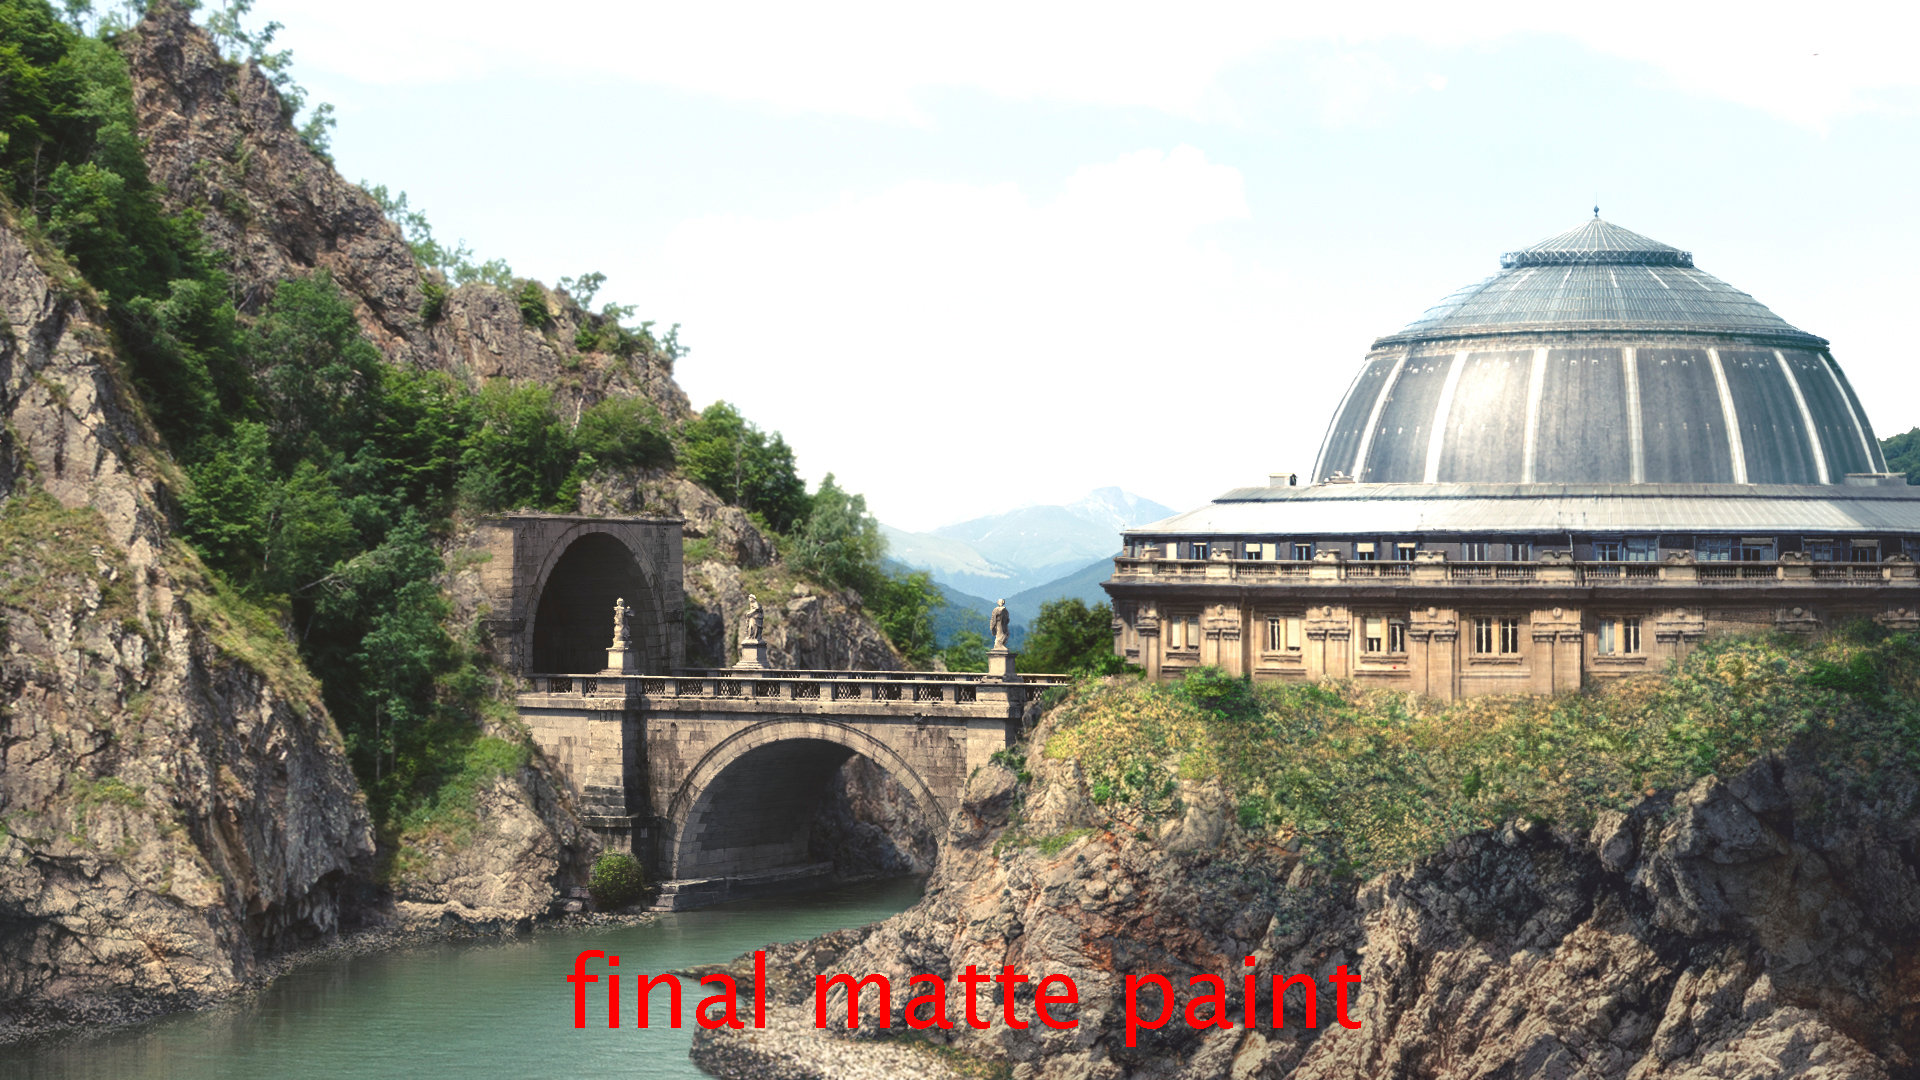
At the end, like a fine color adjustment, I boost the values to give more consistency for a sunny day, mood. This is how our final projection and final matte paint looks like:
This is where our tutorial ends. I hope this helps you build a solid portfolio and lead you to your first DMP artist job.
If there are areas in this tutorial that need further explanations or, you have ideas for other tutorials that will be useful, please get in touch.
Also if you need a 101 mentoring or a quick feedback for your reel, or simply to say “Hi”, don’t be shy and write @ cosmin.dmp@gmail.com