
2. Linear workflow with color depth and color adjustments – Part II
Summary – in this part of the tutorial I will explain the use of the following nodes for color adjustment, in Nuke: Grade, Color Correct and Color Lookup.
a. Grade node – Description.
The most popular node used for color adjustment in Nuke.
You can create the node by pressing “g” on the keyboard or press tab in the Node Graph area and then type grade.
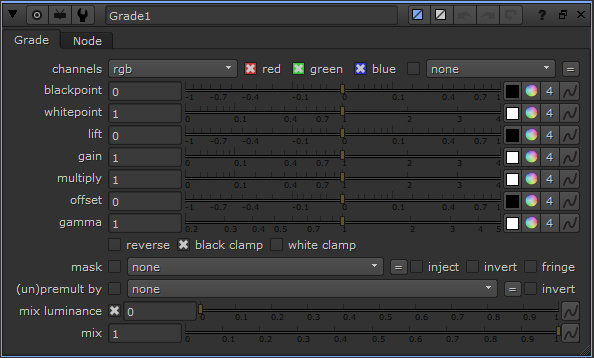 We will focus our attention on this node over the following seven parameters: blackpoint, whitepoint, lift, gain, multiply, offset, gamma.
At the far right of the above mentioned parameters you will see four squares: a color square, a color wheel, a square with number 4 inside plus a wavy line.
The first three squares are icons for color adjustments. The wavy line will create animated keys if pressed, for the associated parameter.
In order to understand the parameters for this node we will split them in three groups:
1. Blackpoint and Whitepoint values represent the dark and bright values range of the image you want to grade.
2. Lift and Gain, are a remapping of the previous values (blackpoint and whitepoint). These two nodes clamp the color range of the graded image to match with the background.
Note: The remapping means that we take the values form the (clamped) modified blackpoint /whitepoint and we consider this being the new values for black and white. Starting from here we readjust the values to match with the background. See the lift and gain parameters, like an extra layer for fine color adjustments over the whitepoint and blackpoint.
3. Multiply, Offset and Gamma are used for final refining of the values form point 1 and 2.
4. Mix is a global parameter for this node and many others. This is used to dissolve between the original image and the background image. Set to 0, the grade node has no impact over the layer applied, set to 100 has full effect over the image.
Since we talk about a linear workflow, the action of all these parameters can be graphically described by a curve that will be explained bellow:
Note: this will be the same curve that we use in Photoshop too, in the previous tutorial.
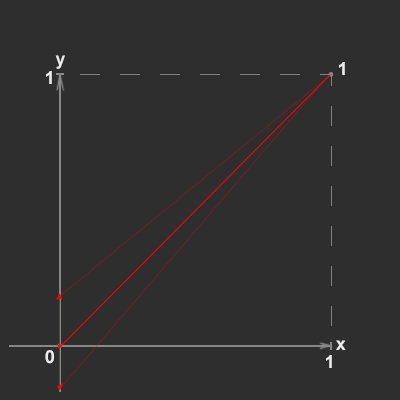
Blackpoint
– controls the black multiplication of the image. It locks the white values and then it pushes up or down the values for black.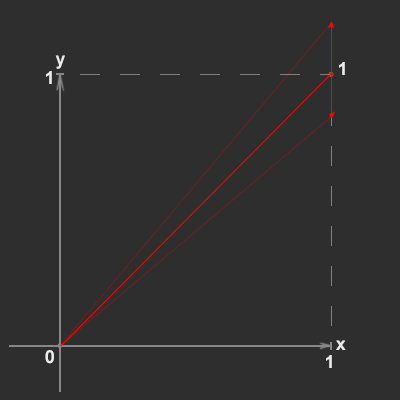
Whitepoint
– controls the white multiplication of the image. It locks the black values and then it pushes up or down the values for white.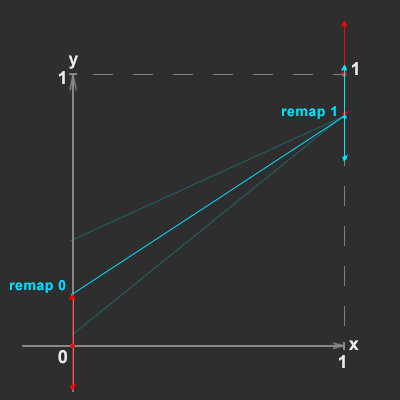
Lift
– clamps the dark values of the image, based on the blackpoint adjustment.
Gain
– clamps the white values of the image, based on the whitepoint adjustment.
Multiply
– creates a multiplication of the bright values. Keeps the darks locked and increases the intensity of the bright values.
Offset
– lifts both black and white values up and down uniformly.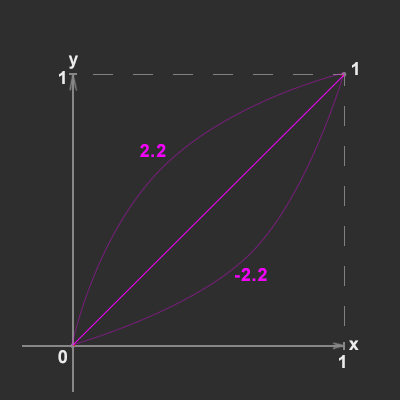
Gamma
– adjusts the intermediate values of the curve.Note: each parameter of this node has an impact over the node/s above it.
Note: in the CG field, “grade” is very commonly used as a synonym for color adjustment in general.
Grade node – functional application.
The standard explanation on how to use the node will be the following:
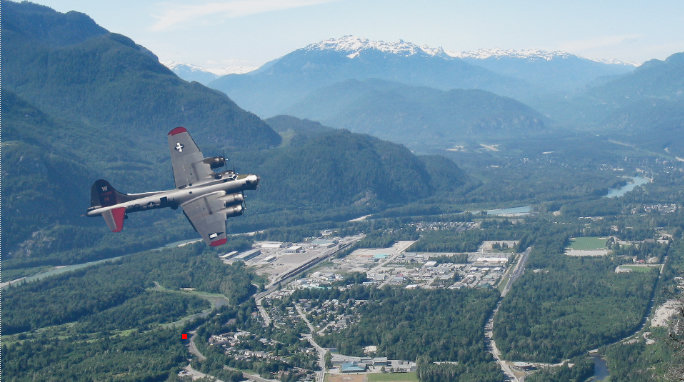
First sample the dark and bright values of the image you want to grade (foreground image), then sample the dark and bright values of the image from the background. If necessary, use multiply, offset and gamma for fine adjustments at the end. The final image should look like this:
These are the steps for selecting each value:
1. blackpoint – select the black square at the right of the cursor and a color picker will be displayed. When you press click on that black square and the picker is displayed, It means that you can select a value from the viewer.

Next increase the value for the exposure of the viewer, in order to determine the darkest value of the element that you grade. Once determined, push back to default value (1) and hold CTRL_SHIFT + drag with LMB a small selection over that area like in the image bellow.
Your blackpoint cursor will switch to 4 cases, which represent the channels Red, Green, Blue and Alpha. You can add fine adjustments of the dark values per channel too, if you adjust each individual channel value. See the image bellow.
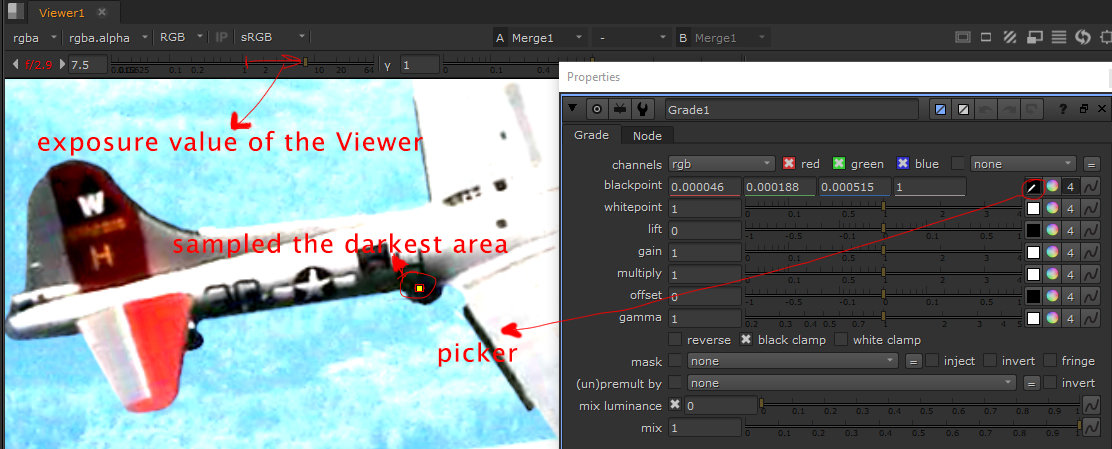
Note: don’t sample the values with exposure up or down, that wil affect the values of your color adjustment. You increase or decrease the value, just so you can determine the darkest and brightest values.
2. whitepoint – we do the same thing as we did for blackpoint, but this time we push the exposure value down so we can see which is the brightest value on the airplane (foreground, graded image). See the image bellow.
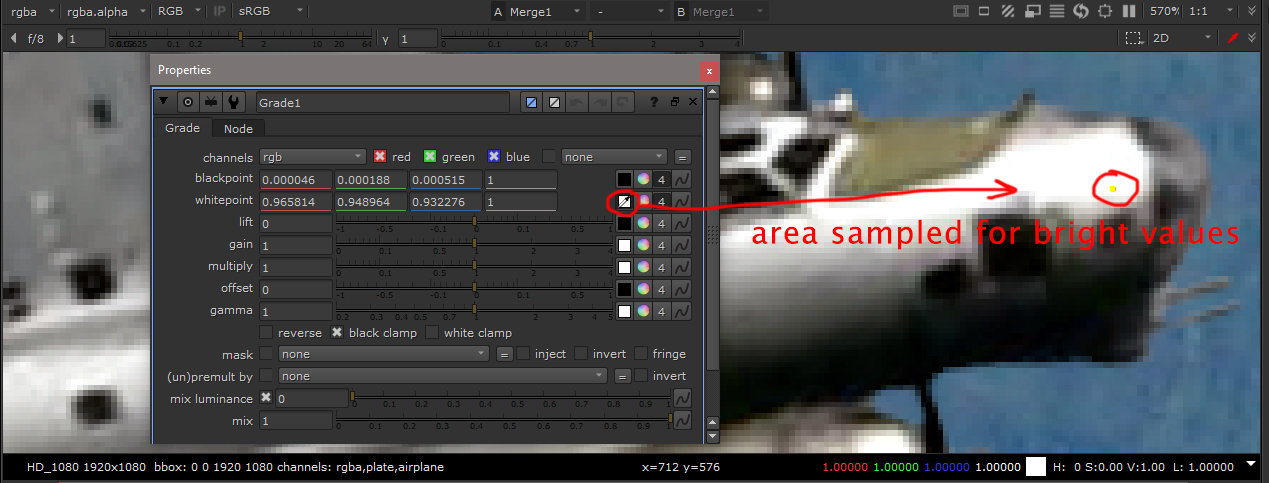
Note: do the sampling while the exposure value is at default value (1).
3. lift – we sample this time the dark value from the background (not the airplane) using same procedure we used for blackpoint. We notice that when we try to sample the value from the background we increase the brightness of the entire image. We need just the airplane to be affected.
At this stage we need an option to cut the element in the foreground, based on the alpha channel and the affect of any color adjustment to be visible only in the area defined by the alpha.
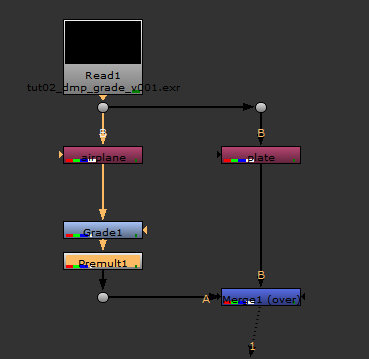
The solution is called Premult node. Press tab and type premult. Place this node under the grade node just like in the image bellow:
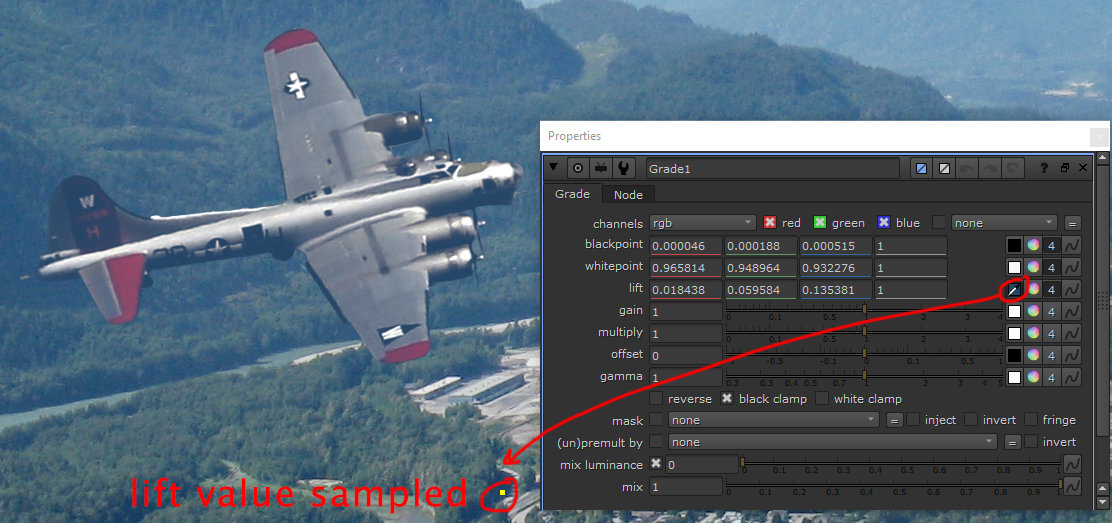
Resample a dark area on the background image. This should look like the image above.
4. gain – Use the same procedure and sample an area in the background that is the brightest.
At this point, you should have a result that matches the image from the beginning of this explanation.
The rest of the adjustments, Multiply, Offset and Gamma are for additional tweaks.
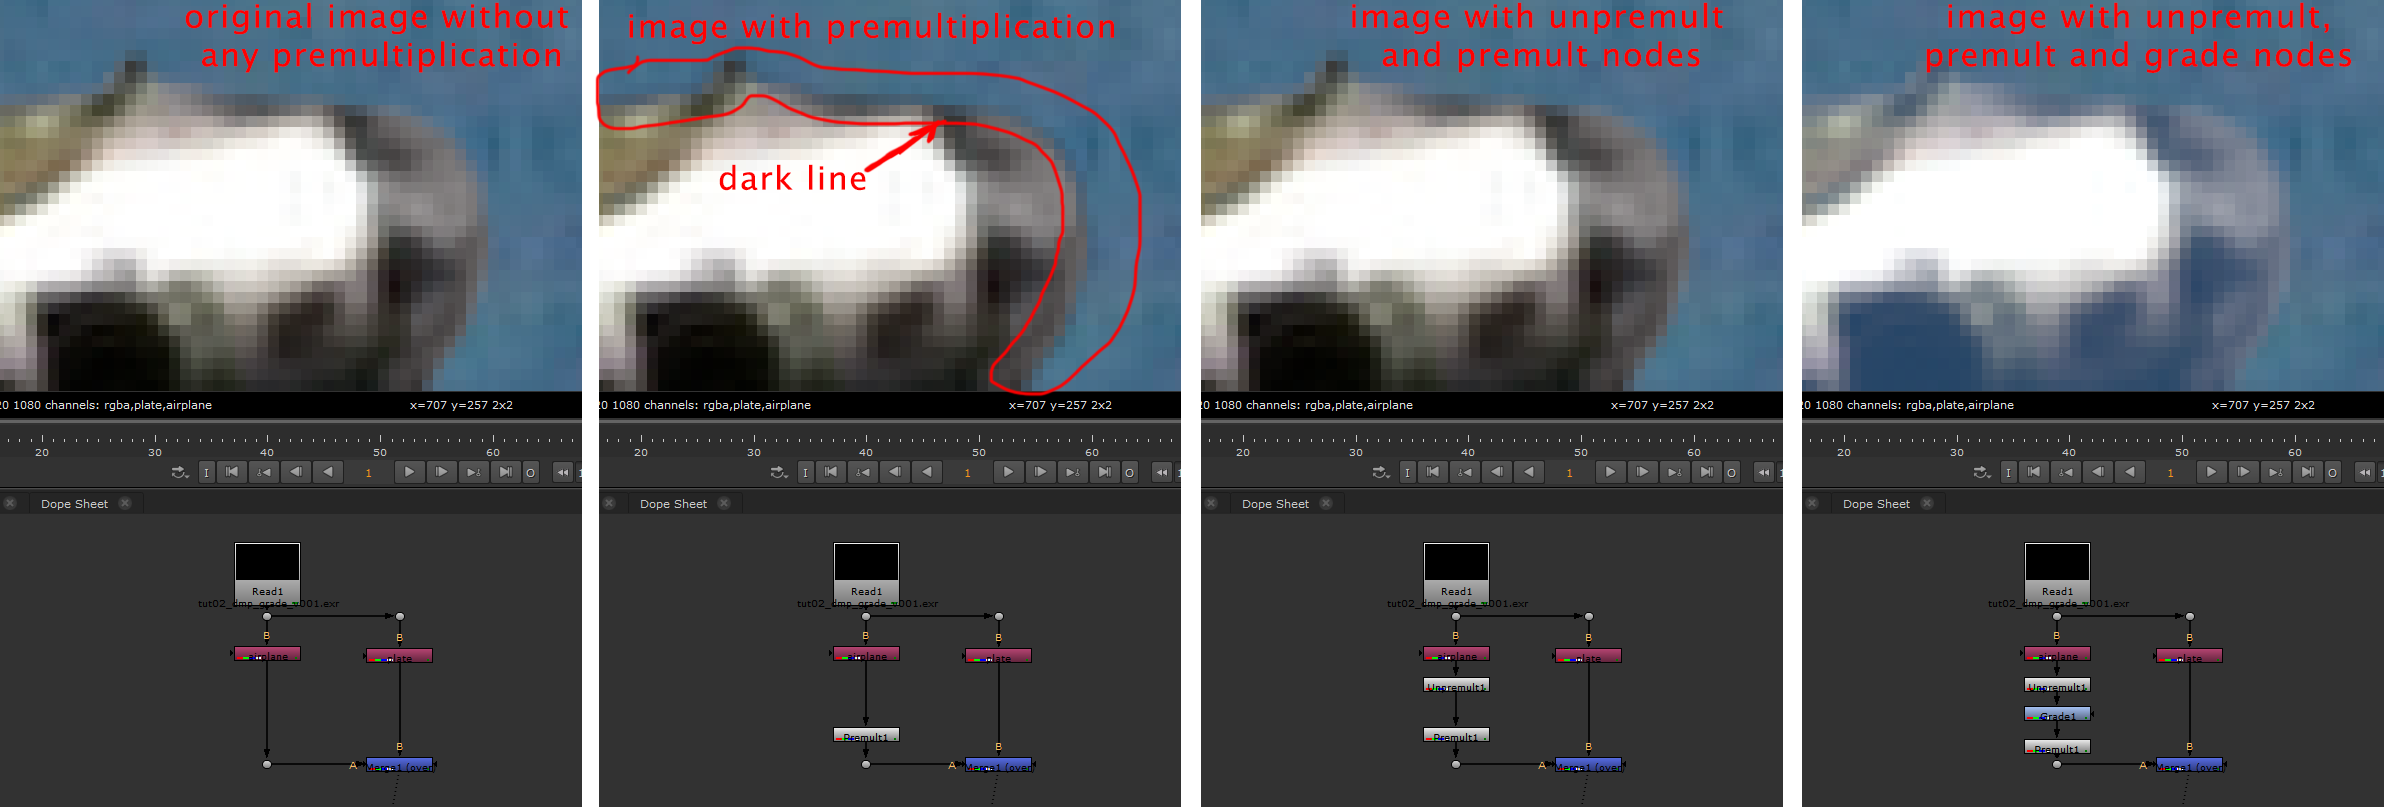
Unpremult and Premult nodes.
We introduced earlier the Premult node, but this node works in conjunction with Unpremult node. The node Premult is helping us to isolate an image, while we apply a color correction node, based on the alpha of that node. As you can see in the pictures bellow, if we apply a premult node over an image, that will create a thin dark line, around the edge of the alpha cut. In order to remove that dark line we need to unpremultiply the image, before we apply a color adjustment.
See the images bellow:
The method for grading, explained above, has two issues when we try to use it.
1. Sometimes either the background or the foreground doesn’t show the whole range of the dark and bright values, like what you can see in the image bellow:
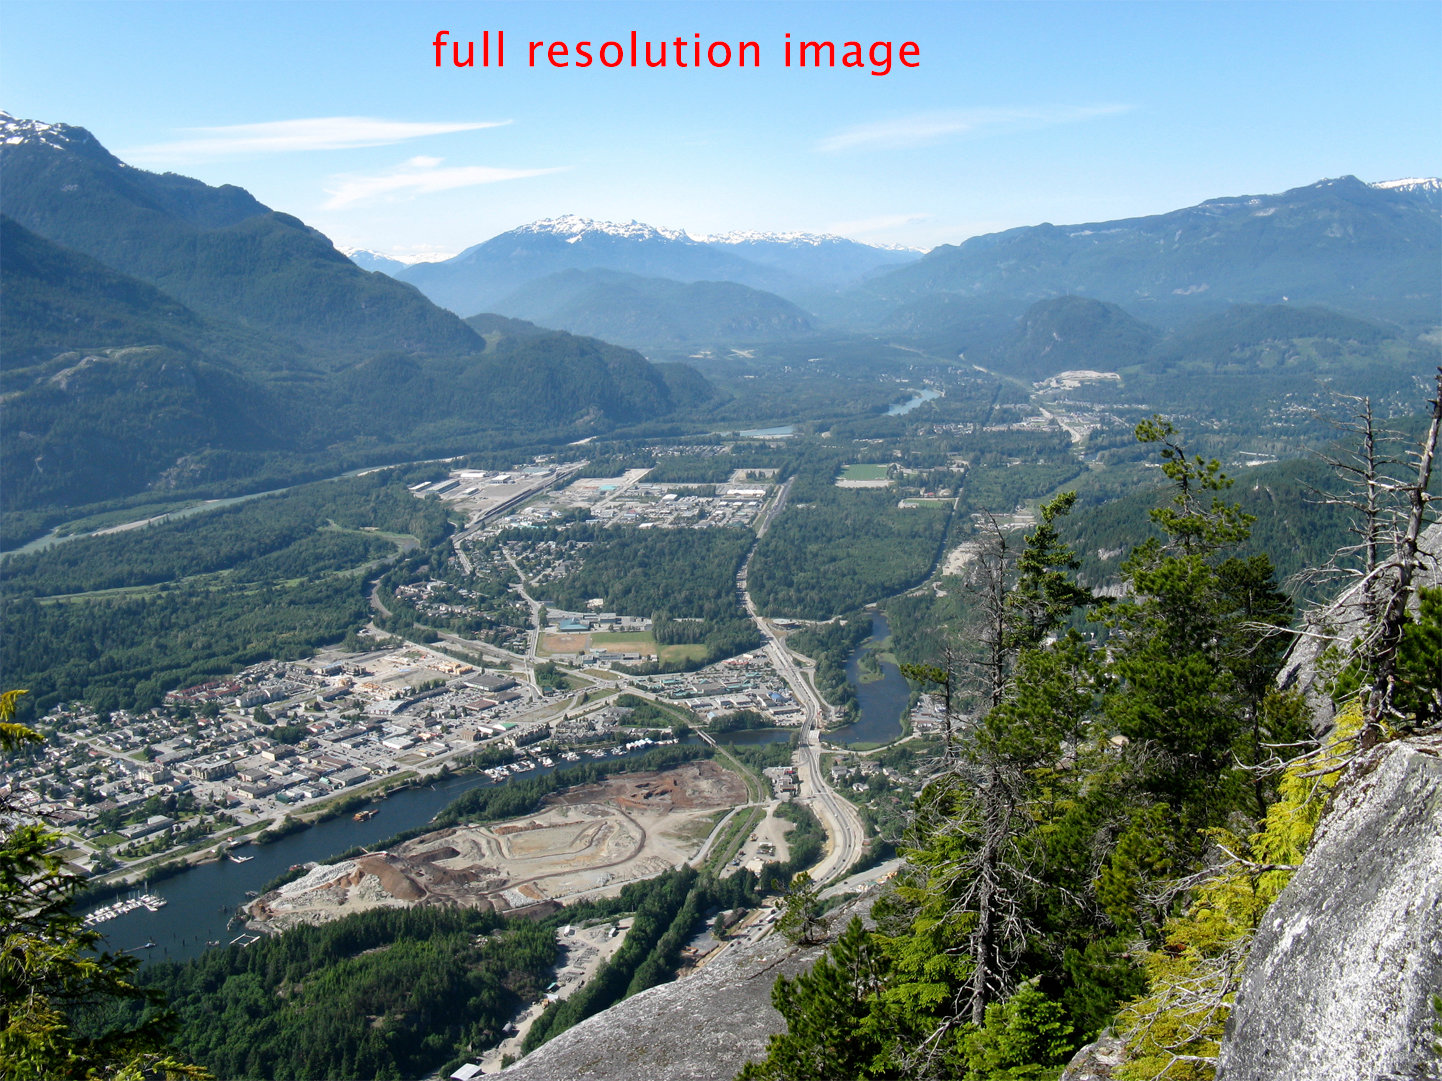
You can notice in the full resolution image, the values for both dark and bright are wider. We have brighter whites and darker blacks.
2. Sometimes the values we want to sample (dark or bright) are clamped (flat colors) and it is hard to determine the real dark and real bright in the images we want to use for sampling. This is why I prefer to do the color match differently and faster. I will explain that bellow.
Personal method for grading:
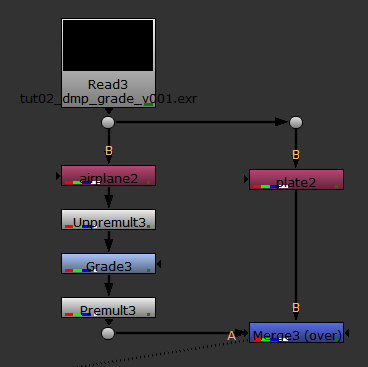 Create the same structure, an unpremult node, followed by the grade node and then the premult node, just like in the image on the side:
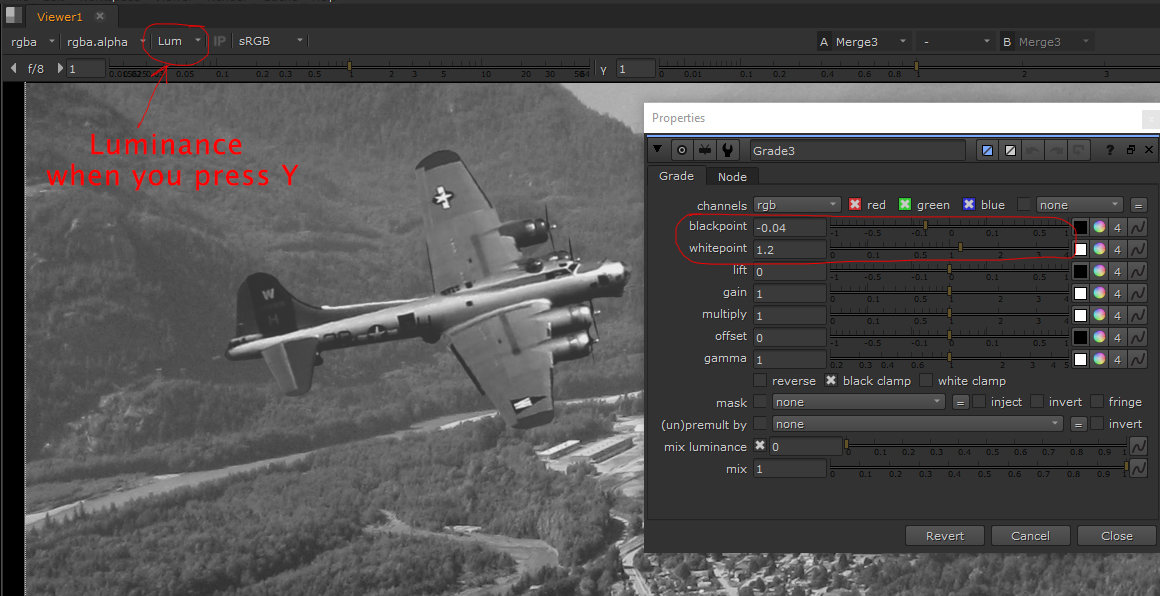
Go with the mouse cursor over the viewer are and press “y”, (Luminance) this will show your image in black and white. Select the Grade node and adjust the value of the blackpoint until it matches the darks from the background.
Do the same thing for the whitepoint too. Don’t forget to increase and decrease the exposure from the viewer to see if the values you adjust, for dark and bright are matching with the background.
Your image should look like this:
Once you finish adjusting the dark and bright values to match the background, press “y” again to move back to RGB. Don’t forget to keep the mouse cursor over the viewer when you press y.
At this stage we have the intensity of the values matching, let’s adjust the color of these values to match with the background.
Go to the number 4 case
By default your values should look like this, once you press the cases with number 4.

Adjusting the channel’s values:
You can simply type the values in each case until you find the right ones, or for an easy matching do the following for each channel:
Select the last number (or the number you want to modify) and then while holding ALT key slide with the LMB right or left until you find a value to match the shadow from the background. See the image bellow for number’s selection.
I found that the following values will work for the blackpoint and whitepoint values.
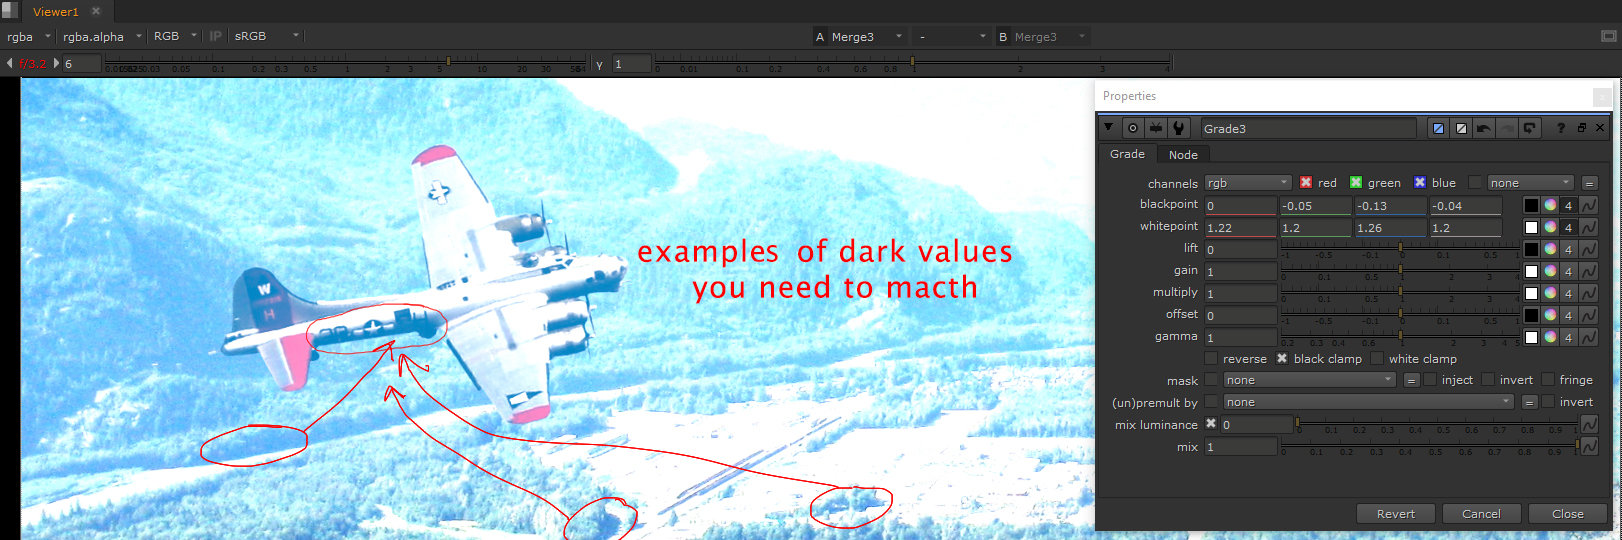
Note: don’t forget to check the adjustments by increasing the exposure value for blacks and decreasing the exposure value for whites, from the viewer. My current image from above has the Exposure pushed up to see if the airplane’s dark values matches the background.
At this stage, the grade is done, you can use the other parameters from the grade node just to add thin layers of adjustments for the airplane.
Next we will continue with Color Correct and Color Lookup.